Your MacBook Air can record decent videos, and they are upload-worthy. So, you can take your time getting your digital camera or smartphone every time you plan to record a video. Most MacBook Air models come up with a high-quality webcam that can do way more than just handle FaceTime calls.
How to record video on MacBook Air? If you are just a beginner with your Mac computer, then the selection of video-recording apps might puzzle you. This guide helps you prep up your MacBook and tells you how to record videos with the built-in webcams of your MacBook Air.
Let’s get started.
How to Record Video on MacBook Air?
Since 2006, all MacBook models have been equipped with webcams. Therefore, you might not need to invest in an external webcam for your MacBook if you are satisfied with the video or image quality. Otherwise, you can spend some extra money and set up an external camera if you want to enhance your recording quality and experience.
How to record video on MacBook Air? You can carry on with native macOS apps to make some home videos. Check out the following apps that you can use to start shooting videos with your MacBook Air:
1. Film Yourself or Your Surroundings with QuickTime Player
How do I record a video of myself on my MacBook Air? QuickTime Player lets you record a video on your MacBook, and the procedure is hassle-free. QuickTime Player is the standard multimedia player for MacBook Air and MacBook Pro devices. It comes pre-installed on your Mac computer, so you need no additional setup steps.
Here’s how to record video on MacBook Air using QuickTime Player:
- Navigate to the Spotlight Search bar and look for QuickTime Player.
- Next, open up the application and click the File option. Choose New Movie Recording from the File drop-down menu.
- You can see your Mac webcam light up at this time. Your portrait and preview will also appear on your MacBook Air screen.
- After that, click on the arrow icon next to the red Record button. The arrow icon will expand options to adjust camera and microphone settings. You can also select the video quality from here.
- Once you find everything satisfactory, click the Record button to start filming whatever you want.
Click on the Record button to stop recording. In addition, QuickTime Player permits you to make minor changes to the recorded video with the Edit menu. Are you ready to save the recorded video?
Head towards the File menu on QuickTime Player. And, click on the Save option to save the video you have recorded with QuickTime Player.
2. Try Photo Booth
How to record video on Mac with sound and special effects? You should opt for Mac’s native app called Photo Booth if you are looking for stylised effects. Photo Booth lets you personalise recorded videos with added filters and special effects. Take photos or record videos with a twist only with Photo Booth.
Here’s how you can use Photo Booth to record a video on your MacBook Air:
- Locate Photo Booth by launching a Spotlight Search bar on your Mac computer. Type down Photo Booth in the search bar and quickly launch the app as soon as it appears.
- The app will display 3 buttons in its lower left corner. Click on the third button that resembles a video camera.
- Afterwards, hit the Effects button from the right pane of the window. This step is optional and only applicable when you want to add specific filters or effects to your video.
- Next, you can click the Record button from the centre of the window.
This should turn on the recording, and you can hit the Record button again to stop the video recording. You can preview the video by clicking on the thumbnail from the filmstrip.
To save the clip on your MacBook, hold the Control key and click on the video thumbnail. After that, select the Export option and choose a location on your MacBook to save it.
3. Use iMovie
Another compatible video-recording application available on a MacBook Air is iMovie. The main reason to avoid iMovie on Mac computers is that it’s quite complicated to use compared to QuickTime Player and Photo Booth.
On the other hand, you need to install this specific application from the App Store. Why should you record using iMovie on your MacBook Air? iMovie is a solid popular application for heavy video editing, especially among iPhone and iPad users. Therefore, you can opt for iMovie if you want to edit your videos directly on iMovie.
Steps to Use iMovie for Recording Video
Check out how to record video on Mac for YouTube, Instagram, or other social media with iMovie:
- Install the iMovie app on your MacBook Air in case you haven’t got it already.
- Next, launch the application and click on the File menu. Choose New Movie from the drop-down menu. As an alternative, choose the Create New option under the iMovie Projects window.
- After this, click on the down-facing arrow or Import icon from the upper portion of the screen.
- Then, select Cameras from the left-side panel of the screen. For best results, select FaceTime HD Camera or the webcam you have attached. Make sure that you grant the app access for the camera and microphone if you use iMovie for the first time.
- Then, choose the project that you would like to import the video to from the upper portion of the screen.
- If you are happy with the adjustment and other details, you can hit the Record button from the lower section of the window.
In case you want to stop the recording, click on the Record button again. Hit the Close option to exit the recording screen. To save the video on your MacBook, click the Projects option from the top left corner and import it into a project.
How to Record Screen on MacBook Air?
Apart from how to record video on MacBook Air, you might be interested in screen recording your device. It’s totally possible to screen-record your favourite shows, YouTube content, and more on your MacBook. However, a few paid apps might constrain screen recording.
Let’s check out how to record screen on Mac with audio:
Use Keyboard Shortcuts
Mac lets you record the whole screen or only selected portions quickly with certain keyboard shortcuts. Here’s what you have to follow to start a screen recording on MacBook Air or MacBook Pro:
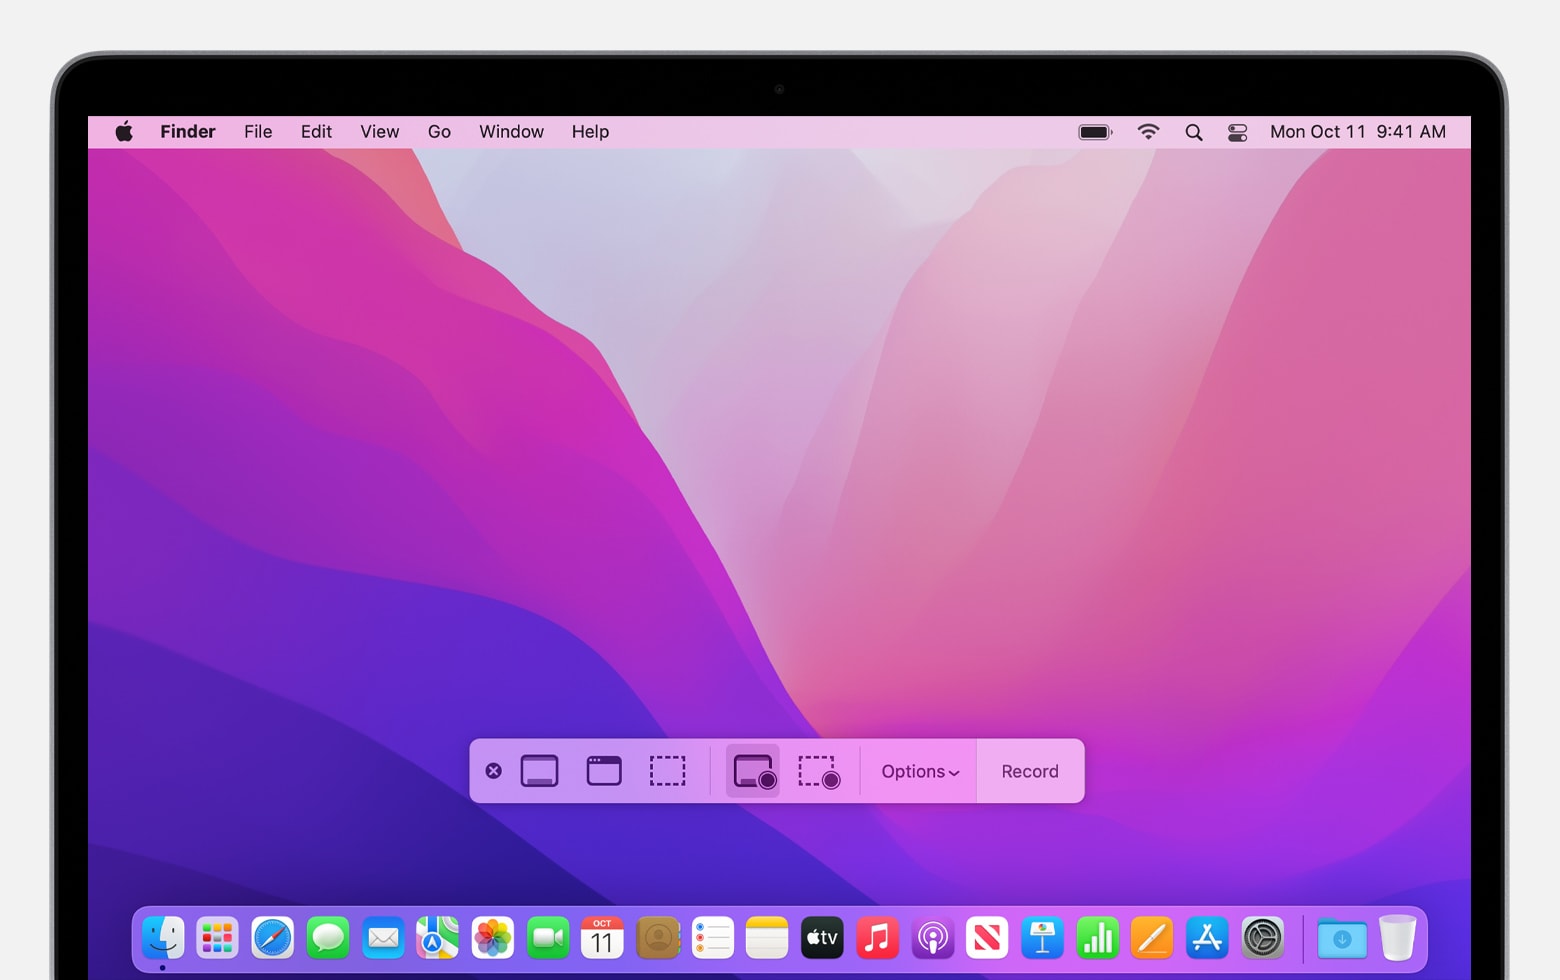
- Press the following keys simultaneously: Command, Shift, and 5. A Screenshot Toolbar will pop up at the lower section of your Mac computer screen.
- You can select the entire screen or selected portion of the screen with corresponding icons. The fourth button after the X icon allows you to record the whole screen. Whereas the button next to the previous one permits you to select a portion of the screen and record it.
- If you want to record a selected screen portion, then you need to drag and adjust the frame before you start recording. Or else, you can proceed with the Recorrd option.
- Once you have recorded the intended video or screen, click the square in a circle icon to stop the recording. The icon should be available at the top of the MacBook screen.
Alternatively, you can press the Command+Control+Esc to put an end to the screen recording.
Try with QuickTime
QuickTime also helps you record screens on your MacBook Air. Here’s how you can opt for QuickTime screen recording with audio:
- Launch QuickTime Player from Applications.
- After that, hover over the File menu and click on it.
- Choose New Screen Recording from the drop-down menu.
- Hit the red Record button to start the screen recording. You can either record the whole screen or record a selected area of the screen by dragging and adjusting the pointer.
- Ensure that you choose Internal Microphone if you want to record the audio too.
Click on the black circle to stop the screen recording. Or else, use the keyboard shortcut of Command+Control+Esc to quit the recording. Go to the File menu and click on Save to save the recorded screen clip.
Handy Tips for Recording Video on Macbook Air
Filming yourself is pretty easy using MacBook Air’s dedicated webcam or external webcam. You can also install third-party apps on your Mac device if you require more customisation. Recording yourself for the first time might cause nervousness.
However, a few tips apart from how to record video on MacBook Air can assist you. For example:
- Level the camera at your eye level for the best communication spark between you and your audience. Additionally, frame yourself in a way that you are visible from your head to your mid-chest.
- Moreover, place decent lighting in front of you. A backlit environment is not suitable when you are filming yourself. Check whether your face is evenly lit.
- You can use an external microphone for a clearer voice. And, speak a little louder than you usually do.
Book a Service from Macbook Repair India
Contact Macbook Repair India if you struggle with how to record video on MacBook Air. Perhaps, your MacBook camera is at fault, or you require a camera setup before getting started. They offer suitable and genuine MacBook repair services at competitive prices.