Apple’s MagSafe charger takes less than an hour to charge a MacBook. But, if it takes forever to charge the laptop or doesn’t charge at all, it might be broken or faulty. Your Mac laptop’s charger might be damaged due to consistent usage or overheating.
Is your Mac device turning off quickly after receiving a full charge? Don’t invest in a new charger. Simply learn the steps on how to fix a broken MacBook charger. Repairing a faulty Apple laptop charger requires technical knowledge and skill. If you have expertise in fixing a broken charger, take an expert’s help to repair it.
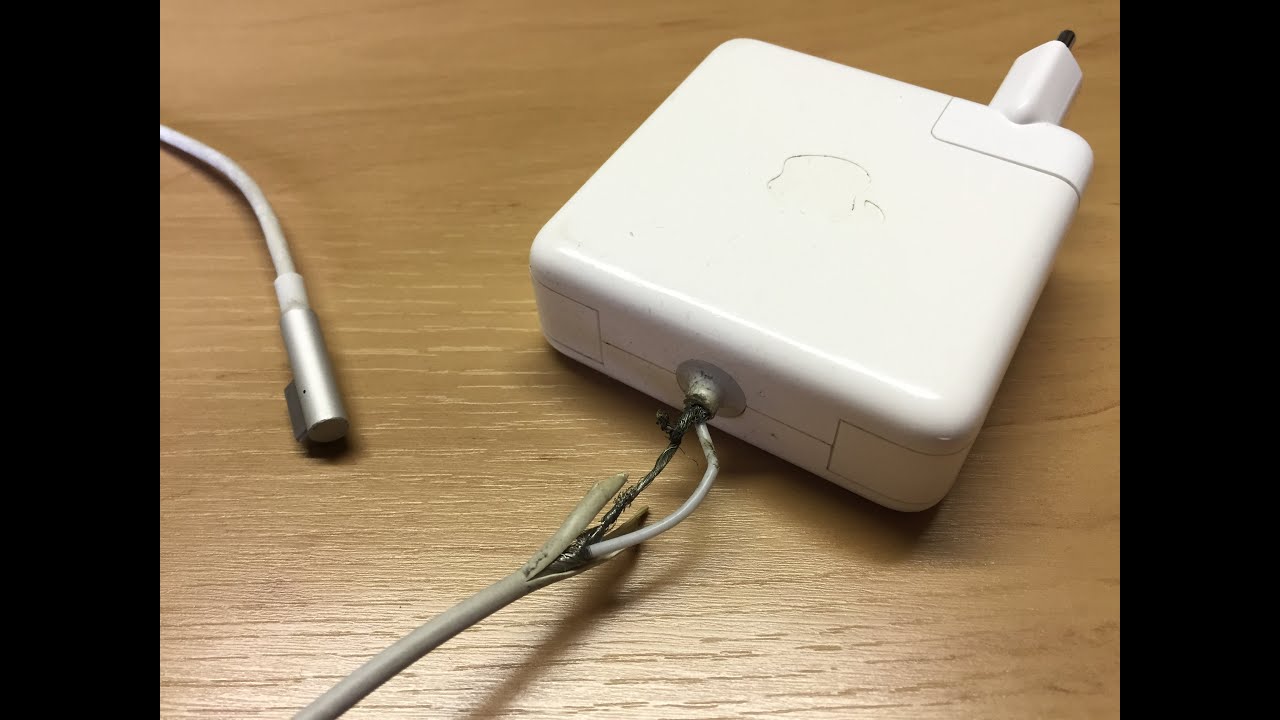
Moreover, identifying a broken MacBook charger is pretty easy. Did you see a frayed charging cable or a crushed portion? There is a high chance that the power adapter is damaged and needs immediate repair. A bent AC plug blade is another sign of a broken MacBook charger.
Try out these troubleshooting tips before repairing the broken MacBook charger:
1. Check Your MacBook’s Power Sources
You must first check if the MacBook is connecting to its power sources securely if it isn’t charging at all. There are several ways to acknowledge whether your Mac laptop’s power units are damaged or working properly. Here is how to check it:
Ensure the Charger is Plugged in
Users must check if the charger is plugged into the MacBook’s USB C port correctly. Disconnect the charging cable from the adapter and reconnect it. Additionally, you must ensure there is no dust or dirt particles inside the charging port for uninterrupted charging.
Check the Power Outlet where the Charger is Connected
MacBook owners must check whether the power adapter is connected to a working electrical outlet. To proceed, unplug your Apple laptop’s charger from the outlet and connect it to another device. If the device turns on, the power outlet is working properly.
Reconnect the power adapter to your Mac laptop after at least 23- minutes and see if it charges. If it doesn’t, turn off your MacBook for 30 seconds. Press the power button to restart the device and connect the adapter and check if it’s charging.
Does the MacBook charger don’t have any signs of wear and tear? There is a high chance that the electrical outlet’s “power on” switch is in the “Off” position. Put it in the “On” position to charge the MacBook without glitches.
Look for Line Noise problems
Line noise problems are a clear indication of a broken MacBook charger. Hence, you must check for this issue when connecting the charger to the laptop. However, you must unplug the power adapter from the wall outlet for at least 60 seconds and then plug it back in.
You might have a line noise issue in the power source if the adapter starts working again. You must reset the power adapter periodically to fix your MacBook’s charging issue.
MagSafe chargers fail to charge the MacBook when the AC adapter’s over-protection feature detects ground noise. Disconnecting and reconnecting the charger from your Mac laptop can eliminate the line noise issue.
You can also try to connect the MacBook’s power adapter to a UPS to avoid line noise problems. Alternatively, users can plug the charger into a different circuit to solve this complicated issue.
Check your Mac laptop charger’s Wattage
Ensure the proper wattage charger for your Mac laptop is used. You must use the MagSafe charger and cable included with the MacBook for a hassle-free charging experience.
2. Inspect your MacBook Charger for Physical Damage
Check if there is any sign of damage on the wire or port on your MacBook’s power adapter. Did you recently buy a Mac laptop? Learn how to test the charger’s AC plug or cable and power port and look for damage.
Start with Checking your Mac laptop’s AC Plug or Cable!
Apple’s MacBook Air and MacBook Pro come with a removable AC plug with blades to insert into a wall outlet. If the Mac laptop doesn’t charge at all, the AC plug might be damaged. Try using an Apple-certified power adapter extension cable to charge your MacBook.
Check Power Adapter’s Port for Dust and Debris
Dust and debris might accumulate inside the MacBook charger port over time. This dust or chrome buildup can prevent your Mac laptop from charging properly. Hence, you must clean the adapter’s power port before proceeding with the repair work.
Wait for the MacBook Charger’s Light to Flash
Your MacBook charger’s indicator light will turn amber when charging the battery. However, if the indicator light on the MagSafe adapter keeps on flashing, try these steps to fix it:
- Access your Mac laptop’s Apple menu and select “Restart” to reboot the device.
- Disconnect the MagSafe cable from the USB-C port of your MacBook and reconnect it after 4-5 minutes.
- Clean the MagSafe charger port and its connector with a dry microfiber cloth.
- Ensure your Mac laptop charger has no damaged pins or exposed wires.
3. Check if the MacBook Charger is Overheating
Your MacBook power adapter might overheat due to continuous use. Thus, you might have encountered the “No charging” issue on your Apple laptop. Keep the MagSafe adapter in a well-ventilated area to prevent it from overheating.
Additionally, you must plug the Mac device’s power adapter directly into the wall outlet via the AC plug. Place the MacBook on a flat surface to avoid overheating issues.
Don’t place the Apple laptop in a poorly ventilated area like a pillow or couch. Avoid covering your MacBook Air or MacBook Pro with a blanket or other insulation.
Your Mac laptop might only sometimes charge if it has a broken pin or bent cables. Its adapter might also turn off if it gets too warm while charging the battery.
If this happens, disconnect the MagSafe charger from your laptop. Wait until the charger cools down and plug it back in for the best charging experience.
4. Install the latest software for your MacBook
Updating your Mac laptop’s software can help you to fix minor glitches. Thus, if the charging issue occurs for a software glitch, you can solve it by installing the latest update. Before repairing the broken charger, you must try this solution.
Here are the steps to update a Mac laptop’s software:
- You must restore your important data on another device before updating the software.
- Connect the MacBook to its power adapter and a stable Wi-Fi connection.
- Access the Apple menu and navigate to “System Preferences” when the next window appears.
- Go to “Software Update” and select “Update Now” or Upgrade now” when prompted.
Retreat your MacBook once it completes the macOS update. Connect the power adapter to the laptop port and check if it’s charging. You don’t have to fix the MacBook charger if the indicator light blinks amber after the software update.
5. Check your MacBook’s Battery Health
A malfunctioned battery can cause charging issues on your MacBook. Hence, if you didn’t see any damage to your charger, the battery might be at fault. Thus, you must check the existing battery condition and replace it if required.
Access your Mac laptop’s Apple menu and locate “System Preferences” when the new window opens. Choose “Battery” and tap on “Battery Health” from the drop-down menu. You will see the following status indicators on the next page:
If you see “Normal” in the Battery Status section, the battery functions properly. Did you receive the “Service Recommended” message? It indicates the battery is facing difficulty in holding the charge or isn’t working properly. You must replace the battery with an expert’s help in such instances.
How to Fix a Broken MacBook Charger Cable?
You can fix a broken Mac laptop charger cable using tools like flush-cut snips. Start with cutting the adapter’s collar charger cable on both sides. Drill through the cable collar and thread the cable back through it.
Prepare your MacBook’s power adapter wires for soldering. Use a utility knife to remove the insulation and twist the strands together. Remove a small part of the insulation from the centre wire and try removing it slightly so that it can fit in the charger case perfectly.
Join your Mac laptop charger’s centre wires with insulation tape. Avoid using too much insulation tape. Otherwise, it might restrict the adapter from insulating the wires. Align the wires and cables in the MacBook charger case properly.
You can also use glue on the cable collar and the cable you fixed. Plug in the charging cable in your MacBook charging port and check if it’s charging. You might need to buy a new charger if the existing one is not working after the repair.
Failed to Fix the Broken MacBook Charger? Contact an Expert immediately
Repairing a broken MacBook charger can be nerve-wracking. Thus, you must hire professionals and repair it with their assistance. Connect with MacBook Repair India experts if the Mac laptop charger is not working. They will evaluate the existing charger’s condition and fix it within minutes. So, join hands with their technicians and repair the faulty charger at an affordable price.