Devices are not perfect, no matter how much innovation you make. Parts will break, features will not work, and even the device might suddenly turn off. This can be very frustrating at times. One such problem is a broken key on MacBook. MacBook is no special. Often apple gets a lot of complaints regarding a fractured key on Mac or even other problems. You will also get a malfunctioning keyboard. You don’t have to worry too much. We have discussed a few fixes that will help you out.
Ways To Fix Broken Key On Mac
Over here, we will discuss the repairing of the broken key on the MacBook. The steps are quite easy. All you need to do is to follow them accordingly. If more than two keys are damaged, it would be better to replace the keyboard than fix it.
Now, in particular, we will discuss when your MacBook has two damaged keys. The steps might vary a bit depending on the models, but you can apply the given steps to MacBook 13, 15 and 17-inch models. Make sure you have the necessary tools to repair it.
Step 1
First, you need to remove the key cap from the damaged or broken part of the keyboard. You need a sharp tool to move in between the key cap and hinge. This will help to lift the broken key.
Step 2
Now turn the key cap over, and you will observe plastic key holders on the bottom of the key. Be very careful that they are not damaged. Keep in mind that when you are about to place the cap on the hinge, it must seat the side with the holders on the edge of the key fist. Make sure the key cap must be seated properly.
Step 3
Use a holder to seat the side on the edge of the key fist. The holders must engage with the hinge. You need to push the button till it snaps on the retainer. Finally, the keep has been repaired. This is just a simple way to repair a damaged key. Also, make sure it moves freely.
Repairing A Complex One
To repair even a complicated one, we have mentioned the steps down below. You need to follow the instructions minutely. The points are easy yet effective.
Step 1
First, use a sharp tool to remove the key cap and ensure the holder is not damaged. Now carefully remove the hinge from the keyboard. Check properly that the hinge is not damaged.
Step 2
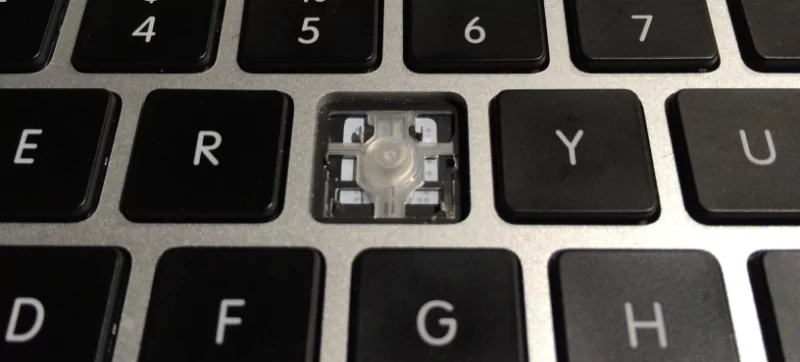
This step is the tricky part. You need to separate the silicone plunge from the keyboard. Make sure you do that very carefully. You need to remove it so cleanly that the bottom side of the plunger remains flat.
Step 3
You might observe that one of the metal hooks has bent, so you need to correct the problem. After that, turn the silicon plunger upside down. Use a small amount of super glue on the plunger edge and ensure it is just on the edge.
Step 4
Place the plunger in the right position and let the glue dry. Don’t put much pressure, or else it might move, and you have to reapply the glue. After that, install the hinge in the right place on the keyboard.
Step 5
Finally, install the key and make sure the key moves freely. The keyboard has been fixed. As mentioned, if there are more than two broken or damaged keys, then it won’t be better to take a new keyboard.
Replacing The Entire Keyboard
Even after knowing all the flaws, if you still want to replace the entire keyboard, then we are here to help you out. Removing the screws and prying can be a bit challenging.
You must be extra careful while repairing the entire keyboard and have enough time.
- Use a screwdriver to remove the screws on the keyboard and then separate the keyboard from the case. Make sure while you are doing this not to damage the connectors on the back of the keyboard.
- After you have removed the keyboard, you can start installing the new one.
- Then align the connector on the new keyboard. And then press down until they connect.
- Now gently push down on the keyboard until it falls into place. After that, insert all the screws that you removed earlier.
Conclusion….
We have mentioned the steps that will help you out in resolving the issue. All the steps are mentioned above sequence-wise. Follow them accordingly. This will sort out the problem.